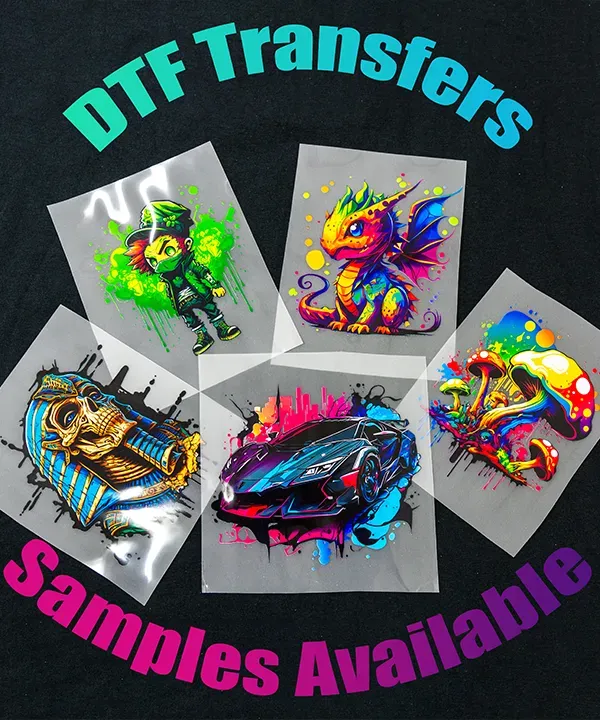
DTF Studio Setup for Supplies and Direct-to-Film Printing
DTF Studio Setup is more than equipment; it’s a carefully designed space that enables reliable Direct-to-Film printing from concept to garment. A productive layout prioritizes a dedicated printing station, a clean powdering area, and the essential DTF supplies to keep cycles moving. From design to positive test prints, a clear process helps you reduce waste, speed up approvals, and maintain color consistency. Align your space with logical stations, ensure proper ventilation, and choose equipment and layouts that support repeatable results. With thoughtful zoning and routine calibration, your studio becomes a reliable engine for high-quality transfers and scalable growth through careful maintenance and ongoing learning.
Think of a DTF studio as a complete transfer operation for garment decoration, not just a printer and a table. The concept expands to an integrated print-to-transfer workflow that blends imaging software, substrate handling, and controlled heat application. In this approach, the focus shifts to how films, powders, adhesion chemistries, and finishing steps align to deliver durable results across fabrics. By framing the setup as a turnkey production space, you can optimize equipment placement, ergonomics, and safety while supporting scalable output.
DTF Studio Setup: Creating a Productive Direct-to-Film Printing Space
A well-planned DTF Studio Setup aligns your space with the DTF workflow, starting with a dedicated printing station for Direct-to-Film printing and a separate area for powdering and curing. This layout minimizes walking, reduces cross-contamination of powders, and keeps you in a steady rhythm from design to finished transfer. Stock the area with essential DTF supplies—and ensure the DTF printer setup includes the latest drivers, RIP software, and substrate-specific color profiles for consistent results.
Color management and environmental control are part of the DTF Studio Setup. Calibrate color profiles with a colorimeter or spectrophotometer, maintain stable temperature and humidity, and provide proper lighting and ventilation so you can trust color reproduction during Direct-to-Film printing. A reliable heat press for DTF with even heat distribution completes the workflow by delivering uniform transfers across garments.
Optimizing the DTF Workflow with Reliable Supplies and Equipment
From design to finish, the DTF workflow should be streamlined and repeatable. Plan each stage—design, print, powder, cure, press, and finish—around documented procedures and reliable equipment. Leverage DTF supplies that pair well with your printer and chosen powders, and use heat press for DTF timings and temperatures that match your substrates. With disciplined workflow and precise DTF printer setup, you can achieve predictable quality across small runs and larger jobs.
Maintenance and scalability go hand in hand with a robust DTF studio. Regular printer head cleaning, nozzle checks, ink level monitoring, and a quick-reference troubleshooting guide reduce downtime during busy cycles. As demand grows, phase in upgrades such as additional printers or a larger heat press, and expand your storage and ventilation to protect your investment in DTF supplies and equipment while sustaining a high-quality DTF workflow.
Frequently Asked Questions
How can I design an efficient DTF Studio Setup for Direct-to-Film printing?
Plan your DTF Studio Setup by defining goals and mapping a logical workflow: design → print → powder → cure → press → finish. Create dedicated stations: a printing station with your Direct-to-Film printer and a reliable computer or RIP software; a separate powdering and curing station; a heat press for DTF with even heat distribution; and a clean, organized supply area with proper lighting and ventilation. Ensure practical details such as adequate electrical capacity, climate control, and safety measures. Finally, organize supplies with labeled bins and easy-access tools to minimize movement and waste.
What are the essential components of a DTF Studio Setup to optimize the DTF workflow?
Essential components include: Direct-to-Film printer and compatible inks; printing films; DTF powders and adhesives; transfer powders and curing equipment; a heat press for DTF with even heat distribution; release papers, tapes, and cleanup supplies; cutting mat and tools; cleaning and maintenance supplies; and design/color management software (RIP, color profiles). For printer setup and color management, configure drivers with substrate-specific profiles, calibrate colors using a colorimeter or spectrophotometer, and perform regular nozzle checks. For the DTF workflow, follow design → print → powder → cure → press → finish, run test prints, ensure even powder coverage, and verify drying and alignment before transfer. Prioritize ventilation and PPE, and keep a quick-reference troubleshooting guide for common issues.
| Section | Key Points |
|---|---|
| Planning and Workflow | Define goals (short runs, custom orders, or mixed). Plan space and budget to support a logical workflow: design → print → powder → cure → press → finish. Use dedicated stations with tools within reach to minimize movement and maximize efficiency. |
| Studio Layout Essentials | Create dedicated zones: printing (DTF printer + computer with RIP), powdering & curing, heat-press with stable surface, and a clean supply area. Ensure proper lighting, ventilation, electrical planning, and safety to prevent bottlenecks and ensure color accuracy. |
| Essential DTF Supplies & Equipment | Maintain a practical baseline: DTF printer + inks, printing films, powders & adhesives, curing equipment, heat press, release papers and cleanup supplies, cutting tools, cleaning/maintenance supplies, and design/color management software. Optimize storage and reduce clutter to support precision. |
| DTF Printer Setup & Color Management | Calibrate and maintain: install proper drivers and substrate-specific print profiles, calibrate colors with targets, clean heads and monitor ink levels, and maintain a stable print environment (temperature/humidity) for consistent color and quality. |
| Printing Workflow: Design to Film | Follow a design-to-film path: design/color setup, print on film using RIP with color management, test prints, powdering/curing, and ensure film is dry before transfer. |
| Pressing, Finishing & Quality Control | Use consistent temperature/time, uniform pressure, correct peel method, and proper cooling. Perform finishing touches and quality checks to reduce rework. |
| Maintenance, Safety & Troubleshooting | Ensure ventilation for powders/curing agents, PPE as needed, regular cleaning, and a quick-reference troubleshooting guide for common issues (banding, color shifts, powder clumps). |
| Budgeting & Scaling | Plan in phases: Phase 1 core setup, Phase 2 expanded production, Phase 3 automation and full-scale operation. Align equipment with space constraints and growth goals, prioritizing consistent workflow and high-quality consumables. |