DTF gangsheet builder: Beginner’s guide to fast gang sheets
DTF gangsheet builder has transformed how designers and print shops approach garment decoration, turning batch layouts into a simple, repeatable process. By grouping multiple designs on a single sheet, you can print more efficiently and reduce material waste while maintaining high print quality. This beginner-friendly tool makes creating printable gang sheets straightforward, even if you’re starting from scratch. Features like grid templates, drag-and-drop placement, and margin controls help you align designs with confidence. With the DTF transfer sheets workflow in mind, a well-chosen gangsheet builder lets you scale your projects quickly and consistently.
A multi-design sheet designer for direct-to-film projects helps studios master gang sheet basics, maximize space, minimize setup time, and ensure consistent results across transfers. Think of it as a layout optimizer for batch printing, where you arrange several graphics on one media surface and export a print-ready file for DTF transfer sheets. For newcomers, this beginners guide to gang sheets explains how to choose a user-friendly tool, set up grids, and preview outcomes before printing. By focusing on clear previews, non-destructive edits, and sensible defaults, you’ll build a reliable workflow that scales with your catalog. As you grow, you can experiment with color management and bleed settings to ensure pristine transfers on garments.
What is a DTF gangsheet builder and why it matters
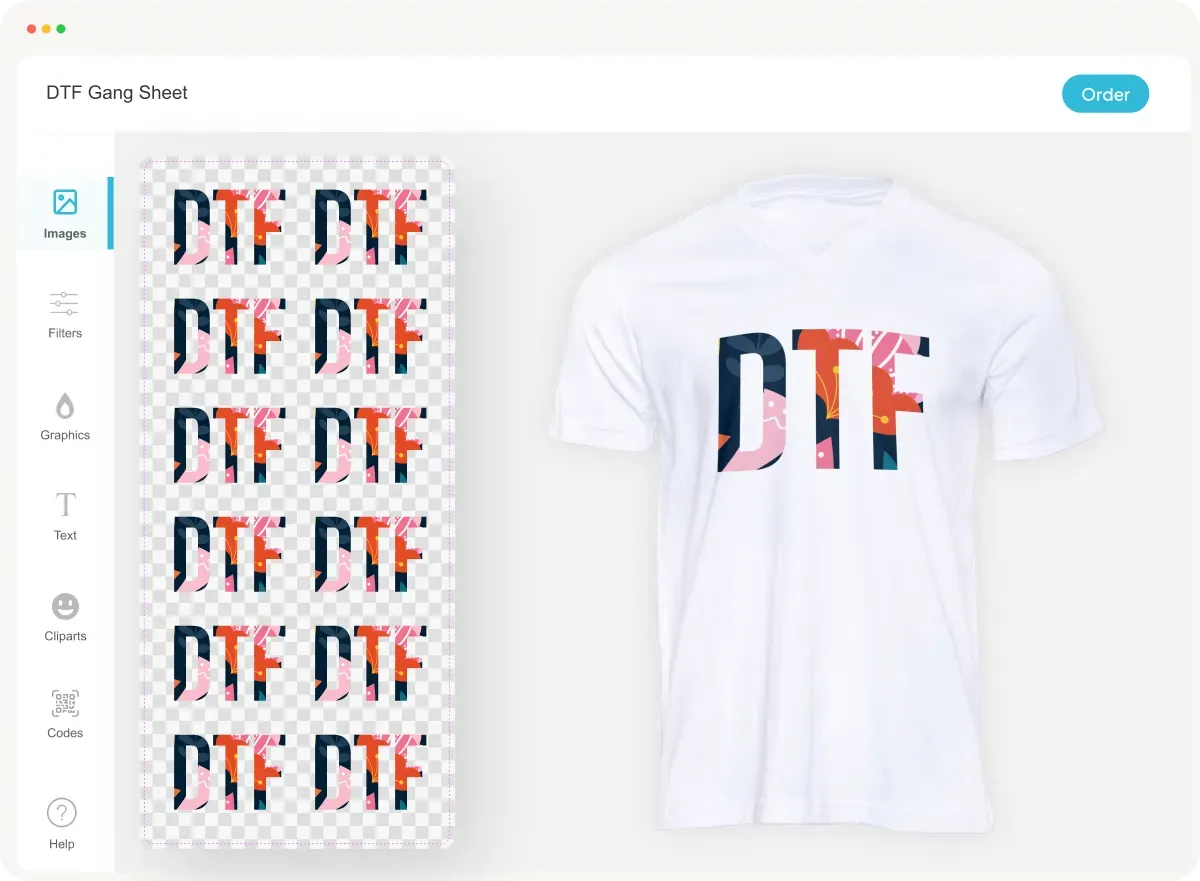
A DTF gangsheet builder is software or an online tool designed to arrange multiple designs on a single sheet for Direct-to-Film transfers. It helps you optimize space, align designs precisely, and export a print-ready file that can be used with DTF transfer sheets. For beginners, a good builder offers grid templates, drag-and-drop placement, margin and bleed controls, color management options, and sensible export presets. The right tool keeps the process simple, with clear previews and defaults that produce high-quality results without requiring advanced design skills.
Using a dedicated gangsheet builder turn the concept of gang printing into a practical, repeatable workflow. It reduces setup time, minimizes material waste, and makes it easier to swap designs or resize elements without starting from scratch. When you pair the builder with a well-organized library of designs and templates, you gain a reliable foundation for producing printable gang sheets that feed directly into your DTF transfer sheets.
Benefits of printable gang sheets for beginner designers
Printable gang sheets consolidate multiple designs onto one sheet, dramatically speeding up production. For beginners, this means fewer setup steps per design and a more forgiving workflow as you learn alignment and color balance. The approach also supports consistency across prints, which helps you build confidence as you scale from a few items to larger runs.
By using printable gang sheets, you reduce material waste and cutting errors, because everything is laid out in advance within a single template. This aligns with the basics of gang sheet basics and provides a practical entry point for those following a beginners guide to gang sheets, ensuring you understand spacing, margins, and export formats before moving on to more complex projects.
Artwork preparation for DTF transfer sheets: color management and file readiness
Preparing artwork with precise color management is essential when working with DTF transfer sheets. Maintain consistent color profiles across all designs, and convert artwork to the printer’s expected color space before importing into your DTF gangsheet builder. This helps preserve color accuracy on the final transfers and reduces unexpected shifts when designs are combined on a single sheet.
Ensure all files are high resolution (typically 300 DPI or higher) and saved in non-compressed formats like PNG with transparent backgrounds when possible. Proper file readiness supports clean previews in the builder and minimizes surprises during printing, aligning with the needs of a beginners guide to gang sheets and the goals of producing reliable printable gang sheets.
Layout design essentials: grids, margins, and alignment for reliable gang sheets
A solid layout starts with grid templates that match your sheet size, along with clearly defined margins and equal spacing between designs. These fundamentals — grid, margins, and spacing — are at the heart of gang sheet basics. A well-planned grid helps you maximize sheet space while keeping artwork legible and easy to trim after printing.
Use alignment guides, snap-to-grid features, and live previews to ensure consistent rows and columns. Non-destructive editing and clear previews let you tweak placements without altering your original artwork, which is especially helpful for beginners who are still learning how different designs interact on a single sheet.
Troubleshooting common issues in DTF gangsheet workflows
Common issues include misalignment after transfer, color drift between designs, blurred artwork from upscaling, and ink bleed. Each problem can be traced back to layout choices, color management, or printer settings. Address misalignment by ensuring proper bleed and margins, validating printer calibration, and using consistent media settings across designs.
When you encounter color drift, revisit color profiles and perform test prints to pin down the best preset. For blurry or pixelated images, confirm all artwork is high resolution and avoid upsizing within the builder. Regular calibration of your DTF transfer sheets and curing times also minimizes smudging and ensures reliable results across runs.
A practical beginner workflow: from files to print-ready gang sheets
This practical workflow guides you from gathering assets to exporting a print-ready gang sheet for DTF transfer sheets. Start by collecting designs, ensuring they are high resolution and properly named, then move to setting up a grid that matches your sheet size. This approach aligns with the beginner-friendly mindset of a beginners guide to gang sheets and the goal of creating printable gang sheets efficiently.
Next, import and arrange designs, optimize colors, and preview the final layout before exporting in a print-ready format such as PNG or PDF. Run a test print on scrap media to verify alignment and color, then proceed to production. Following this sequence helps you build a reliable, repeatable workflow that scales as you gain experience with DTF technology.
Frequently Asked Questions
What is a DTF gangsheet builder and how does it work?
A DTF gangsheet builder is software or an online tool that arranges multiple designs on a single sheet for Direct-to-Film transfers. It optimizes space with grid templates, drag-and-drop placement, margins and bleed controls, color management, and export presets to produce print-ready files for DTF transfer sheets.
Why is a DTF gangsheet builder useful for a beginners guide to gang sheets?
Using a DTF gangsheet builder speeds up setup, improves consistency, reduces material waste, and teaches core concepts covered in a beginners guide to gang sheets, such as grid layouts, alignment, and export settings.
What features define a beginner-friendly gangsheet basics tool?
Look for gang sheet basics like simple grid templates, drag-and-drop design placement, basic color management previews, export options (PNG or PDF), non-destructive editing, and clear previews to ensure you can create printable gang sheets with confidence.
How do I start using a DTF gangsheet builder to create printable gang sheets?
Start by gathering artwork, setting up a sheet and grid, importing and arranging designs, previewing for alignment and color, and exporting a print-ready file (PNG or PDF) suitable for printable gang sheets used with DTF transfer sheets.
What common issues should I watch for when using DTF transfer sheets with gang sheets, and how can I troubleshoot?
Common issues include misalignment, color drift, blurry images, and ink bleed. Troubleshoot with proper margins and bleed, consistent color profiles, high-resolution artwork, and test prints to confirm results before mass printing.
Can you provide a quick example of using printable gang sheets for a small design catalog?
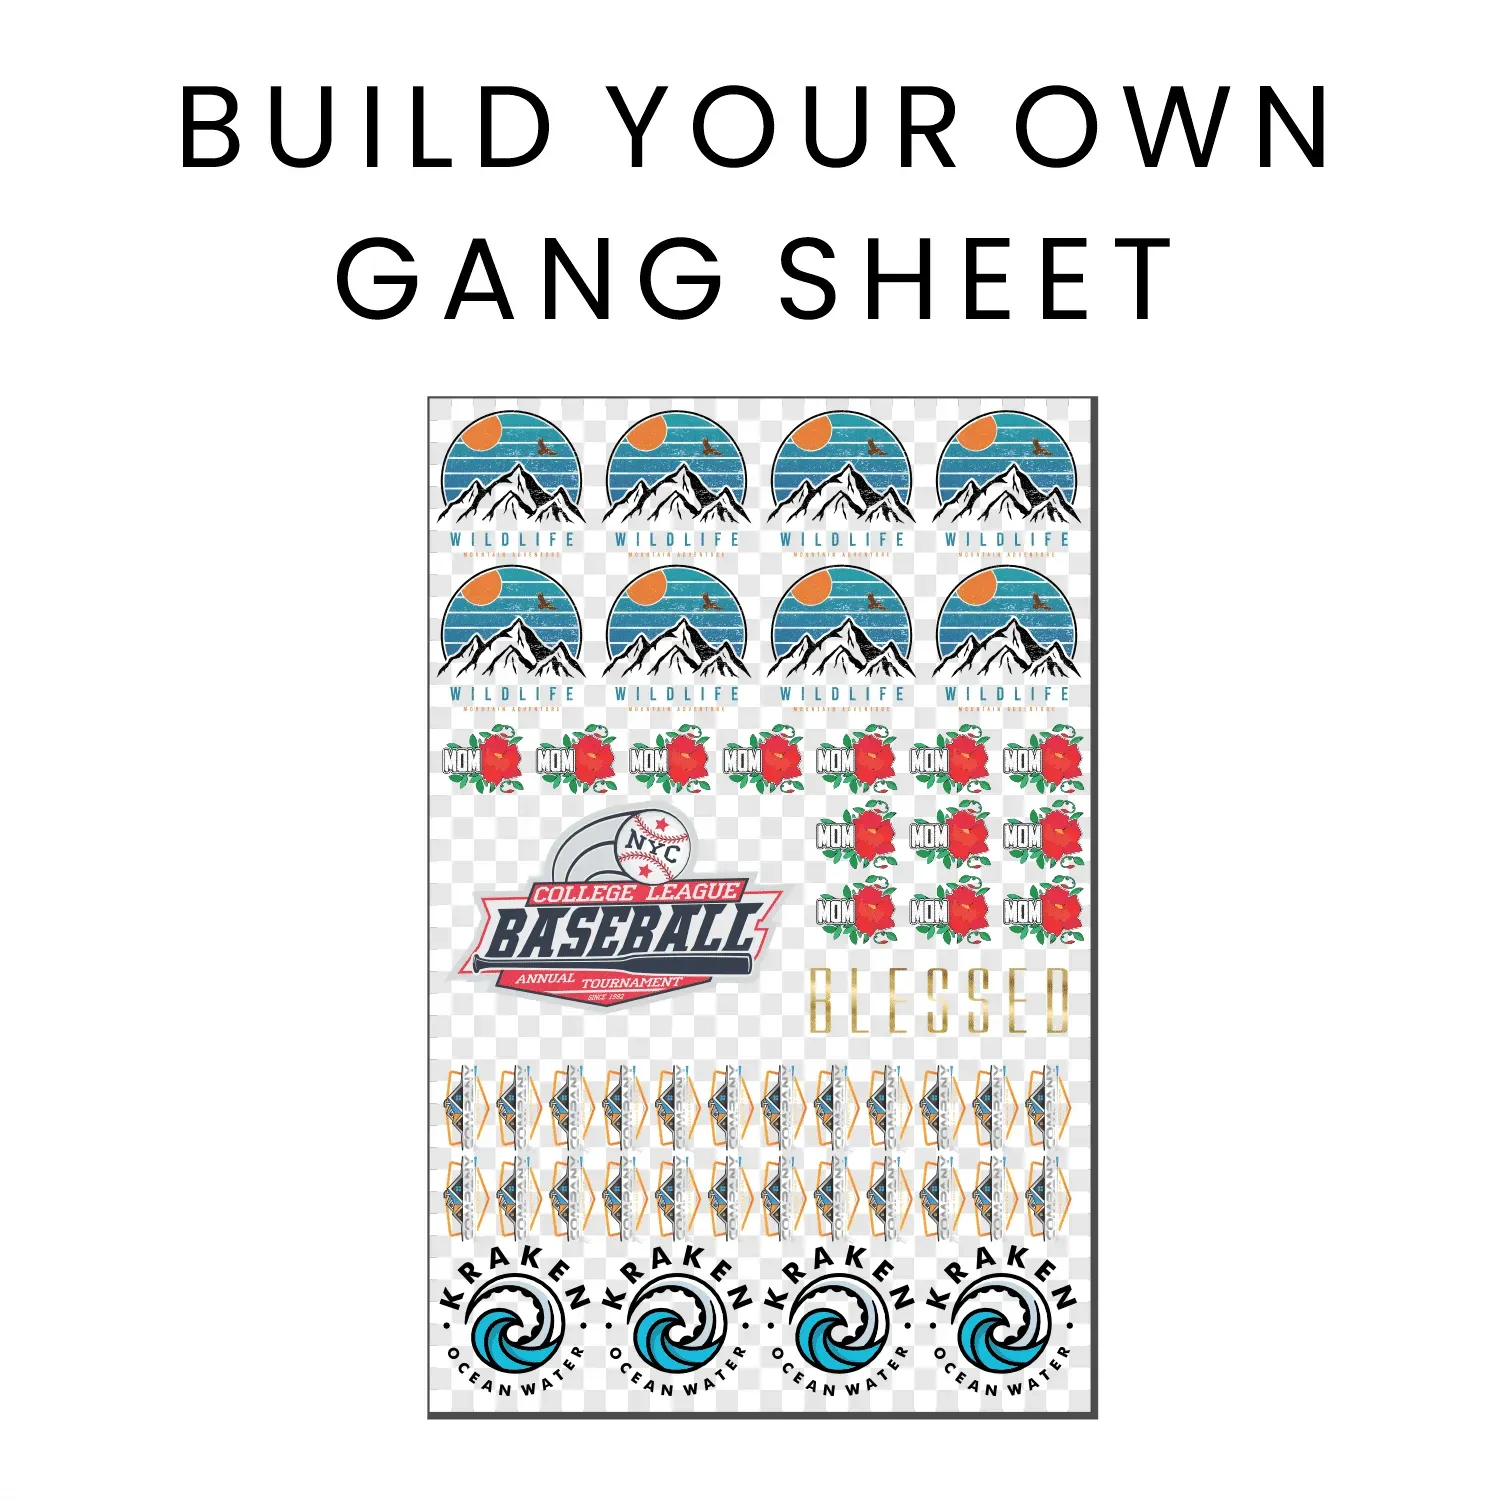
Example: place 12 designs on one gang sheet using a 4×3 grid, ensure even margins, preview color accuracy, export as a high-quality PNG, and run a test print on scrap media before producing the final batch of printable gang sheets for DTF transfer sheets.
| Aspect | Key Points |
|---|---|
| What is a DTF gangsheet builder? |
A software or online tool designed to arrange multiple designs on a single sheet for Direct-to-Film transfers. It optimizes space, aligns designs precisely, and exports a print-ready file for DTF transfer sheets. Typical features include grid templates, drag-and-drop placement, margins and bleed controls, color management options, and export presets. For beginners, look for simplicity, clear previews, and sensible defaults that produce high-quality results without requiring advanced design skills. |
| Why use a gangsheet builder? |
|
| Key features for beginners |
|
| Getting started (step-by-step) |
|
| Practical tips for printable gang sheets |
|
| DTF transfer sheets and color considerations |
|
| Common issues and troubleshooting |
|
| Best practices for beginners |
|
| A practical example: printing a small color catalog of designs |
Imagine 12 designs on one gang sheet. Choose a standard sheet size, set up a 4×3 grid with even margins, import artwork, arrange in a balanced layout, preview, and export as high-quality PNG. Run a test print on scrap media to confirm alignment and color before batch printing on final stock. |