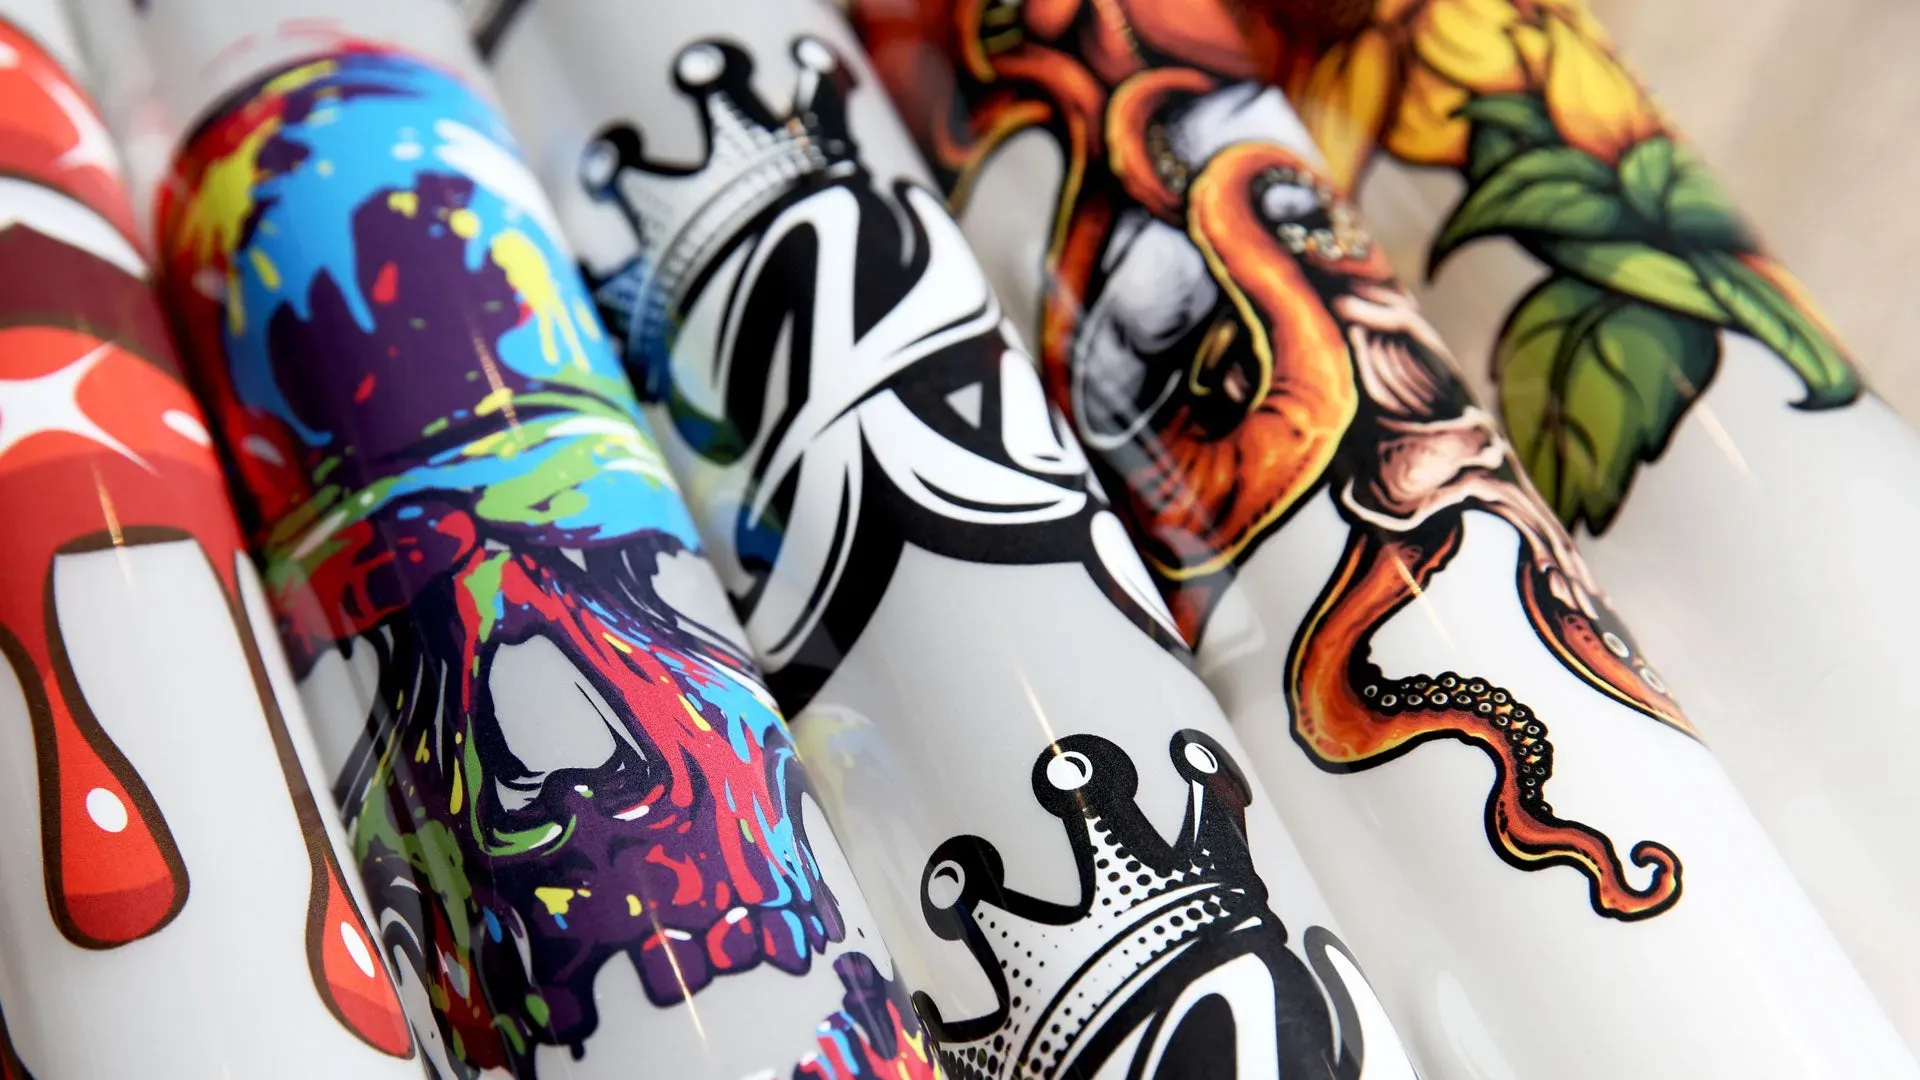
DTF Transfers Design Essentials: From Artwork to Workflow
DTF Transfers design essentials guide designers, print professionals, and business owners who want a smooth path from idea to finished wearable art. Direct-to-film transfers have transformed short-run apparel by combining vibrant color, strong adhesion, and a production workflow that scales from samples to small batches. This guide emphasizes end-to-end steps—from artwork preparation for DTF to the practical steps of film, heat, and transfer—that ensure repeatable results. The guide also highlights color management, substrate choices, and quality checks that contribute to durable, vibrant finished products. With clear design considerations, standardized file setups, and built‑in quality checks, you can reduce waste, reprints, and lead times.
In LSIs and SEO terms, this topic is described with alternative expressions such as direct-to-film transfer technology and film-based textile printing that move artwork from digital design to fabric. This keeps the discussion anchored in core concepts without overreliance on a single keyword, while still guiding readers toward practical workflow. For hands‑on planning, we discuss DTF heat press settings and the broader production path that leads from design to durable wear. This alternative framing supports a scalable production workflow for DTF transfers, linking ideas to repeatable factory outcomes. Together, these LSIs help you align creative goals with manufacturing realities while staying friendly to search engines and readers.
DTF Transfers: Aligning Artwork Preparation with Your DTF Printing Workflow
Bringing artwork to life for DTF transfers starts with a precise alignment between the design intent and the capabilities of the DTF printing workflow. Focusing on artwork preparation for DTF ensures files are print-ready and reproducible across runs, reducing guesswork during production. Key steps include saving final art as lossless files (PNG for raster, TIFF for high-detail elements), targeting 300–600 DPI at the intended print size, and converting vector elements to outlines to prevent font changes. By establishing clean layer organization, proper bleed and safe zones, and careful handling of borders and outlines, you set a solid foundation for consistent results in the DTF transfers process.
Effective color management and proofing are essential to translating screen design into durable fabric prints. Calibrate monitors, use soft-proofing to anticipate color shifts, and maintain consistent ink saturation through a reliable RIP workflow. Document settings for repeatability—DPI, print mode, ICC profile, and film-to-substrate distance—so artwork preparation for DTF translates predictably from one batch to the next. Testing with swatches on the chosen fabric lets you verify color reproduction, clarity, and adhesion before committing to a full production run, ensuring the DTF transfers retain vibrancy and detail in real-world wear.
Streamlining Production: Building a Robust Production Workflow for DTF Transfers
A solid production workflow for DTF transfers starts well before the printer powers up. Pre-press checks, substrate and film compatibility, and a clear batch-planning strategy minimize variability and shorten lead times. Establish a documented process that covers fabric preparation, film and adhesive readiness, and color alignment between artwork and print. By integrating quality control at every stage and using standardized job sheets to record settings, you create a repeatable production workflow for DTF transfers that scales from single samples to small-batch orders.
As demand grows, scalability becomes the goal. Invest in reliable printers, durable films, and stable adhesive systems, and train operators in standard operating procedures (SOPs) for file prep and press settings. Automation options for batch handling can further reduce cycle times without sacrificing quality. In this optimized workflow, post-processing steps such as trimming, lint removal, and packaging are part of the value chain, ensuring that DTF heat press settings are consistently tuned across fabrics and designs, and that each finished product meets customer expectations for colorfastness, wash durability, and overall presentation.
Frequently Asked Questions
What are the key steps in artwork preparation for DTF to ensure reliable transfers within the production workflow for DTF transfers?
Artwork preparation for DTF is the foundation for color accuracy, image sharpness, and adhesion. Use lossless formats (PNG for raster, TIFF for detail), target 300–600 DPI at the final print size, convert vector elements to outlines, work in CMYK with calibrated profiles, organize layers by color, and include bleed and safe zones. Test the artwork on fabric swatches to verify color reproduction, clarity, and adhesion, helping ensure a predictable production workflow for DTF transfers.
How do DTF heat press settings influence the DTF printing workflow and what should you tune to optimize the production workflow for DTF transfers?
DTF heat press settings directly affect adhesion, colorfastness, and wash durability. Start with 175–190°C (347–374°F), 10–20 seconds, and firm, even pressure. Adjust for fabric type and adhesive formula, then allow a brief cooldown after pressing. Conduct test runs and document the settings to maintain consistency, supporting an efficient DTF printing workflow and a reliable production workflow for DTF transfers.
| Aspect | Key Points |
|---|---|
| Introduction | – DTF Transfers Design Essentials serves as a practical guide for designers, print pros, and business owners to move from idea to finished wearable art. – DTF transfers enable vibrant color, strong adhesion, and a workflow scalable from single samples to small-batch production. – Emphasizes an end-to-end process from artwork to final production workflow with essential design considerations, settings, and quality checks. |
| Understanding the DTF transfer process | – DTF printing is a two-stage workflow: artwork preparation and the transfer process. – Artwork provides color accuracy, sharpness, and durability; the production side uses hot-melt adhesive film with heat and pressure. – Aligning design intent with technology’s capabilities improves predictability, reduces waste, and shortens lead times. |
| Artwork preparation for DTF | – File format and resolution: use lossless formats (PNG for raster, TIFF for high detail); 300–600 DPI; convert vectors to outlines. – Color mode and profiles: work in CMYK with calibrated profiles; soft-proof RGB to CMYK. – Layer organization: separate by color; keep text, outlines, textures distinct; avoid complex transparency. – Bleed, margins, and safe zones: include bleed; keep critical elements in safe zones. – Borders and outlines: increase stroke widths for small text; adjust anti-aliasing for fabric. – Test art with swatches: verify color, clarity, and adhesion on actual fabric. |
| DTF color management and file setup | – Calibrated monitors and soft-proofing to anticipate color output. – Consistent ink saturation using a reliable RIP; monitor nozzle health. – Document settings and save standard procedures (DPI, print mode, ICC profile, film-to-substrate distance) for repeatability. |
| Printing workflow for DTF transfers | – Substrate and film compatibility: choose coating-compatible PET film and appropriate adhesive for fabric. – Print mode and resolution: balance accuracy and speed; 600 DPI for crisp details; adjust for larger solid areas. – Ink management: keep cartridges clean and monitor nozzle health. – Dwell time and cooling: cool printed film briefly before applying adhesive to prevent smudging or warping. |
| DTF heat press settings and transfer execution | – Temperature: start around 175–190°C (347–374°F) and adjust for fabric and adhesive. – Time: typical 10–20 seconds, depending on fabric thickness. – Pressure: apply firm, even pressure; use calibration mat or gauge. – Post-press handling: allow cooldown before removing backing film to improve durability. |
| From artwork to production workflow: streamlining production | – Pre-press checks: inspect fabrics, film, adhesives; verify color alignment and alignment marks. – Batch planning: group orders by fabric and color; standardize job sheets for settings. – Quality control at every stage: quick QC for print clarity, color, and adhesion. – Post-processing and finishing: trimming, lint removal, garment presentation. – Storage and inventory: use FIFO practices and clear labeling to minimize waste. |
| Common pitfalls and troubleshooting | – Banding or color gaps: calibrate printers, check heads, verify film/adhesive. – Bleed or edge lifting: adjust dwell time or pressure; ensure surface is clean. – Crackling or stiffness after wash: verify adhesive formulation and curing; consider post-curing. – Fading colors after washing: confirm colorfast inks and provide proper care instructions. |
| Quality control and continuous improvement | – Implement a simple QC checklist for each order: print sharpness, color balance, and alignment. – Conduct adhesion tests and wash-cycle tests on representative samples. – Document deviations and corrective actions for ongoing improvement. |
| Scaling up: from small runs to production work | – Invest in reliable printers, durable films, and stable adhesives. – Train operators and document SOPs for file prep and press settings. – Explore automation options for batch handling to reduce variability and facilitate onboarding. |
| Conclusion | – Summary: A holistic DTF Transfers approach ties artwork preparation to a robust production workflow, delivering consistent, high-quality results. – Key benefits include reduced reprints, shorter lead times, and scalable operations. – A well-documented process with strong color management and QC ensures vibrant, durable prints that stand up to real-world wear. |
Summary
DTF Transfers demand a holistic, end-to-end approach that starts with artwork preparation and flows into the production workflow. By aligning design intent with the technology, selecting appropriate film and adhesive, and tuning heat-press parameters, teams can achieve consistent, high-quality results. This approach minimizes waste, shortens lead times, and scales operations while delivering durable, vibrant garments. A well-documented process with ongoing quality control helps ensure that DTF transfers look great, hold up to washing, and withstand real-world wear.