DTF Transfers: How They Work for Beginners and When to Use
DTF transfers (direct-to-film transfers) have surged in popularity as a versatile option for apparel decor, offering a modern alternative to traditional methods. From hobbyist tees to small-batch orders, this approach delivers rich color and crisp detail across fabrics for DTF transfers. Understanding the DTF printing process, and mastering heat press settings for DTF, helps you achieve durable, vibrant results. DTF vs screen printing shows when this method shines, particularly for multi-color artwork and short runs, where setup complexity and cost are lower. With the right setup, you can optimize cost, turnaround times, and quality from design to garment, meeting demand with confidence.
Viewed through the lens of film-based transfers, this approach uses a printable carrier and heat to bond images to fabric, aligning with terms like direct-to-film printing and film-to-garment decoration. In the broader landscape of digital textile printing, this method sits alongside heat-transfer processes and dye-sublimation as a flexible option for multi-color artwork and photography-inspired designs. From a practical standpoint, consider fabrics suitable for this workflow, the film’s adhesive layer, and how heat press settings influence adhesion and wash durability. By weighing options such as direct-to-film, screen-based options, and other garment decoration techniques, you can tailor choices to order size, design complexity, and budget.
DTF Transfers Demystified: What Are Direct-to-Film Transfers and How They Work
DTF transfers, short for direct-to-film transfers, represent a digital garment decorating method where a design is printed onto a specialty PET film using a CMYK plus white ink system. In this setup, the term direct-to-film transfers emphasizes that the design travels from a digital file to the film and then onto fabric via heat and pressure. The result is a vibrant image with smooth gradients and fine details, often suitable for photorealistic artwork and small runs.
Unlike traditional screen printing, the DTF printing process eliminates the need for separate color screens, which makes setup faster and more flexible for variable artwork. The white underbase helps preserve brightness on dark fabrics, and the combination of adhesive powder and heat-activated polymer in the film ensures durable adhesion and a clean edge on a wide range of textiles.
The DTF Printing Process: From Design to Film to Garment
During the DTF printing process, a design is prepared in software with correct color management and exported for CMYK plus white ink. A reputable DTF printer lays down the cyan, magenta, yellow, and black layers along with a white layer that acts as an opacity base, ensuring true color on both light and dark fabrics. The result on the PET film is a reverse image that will transfer when heat and pressure are applied.
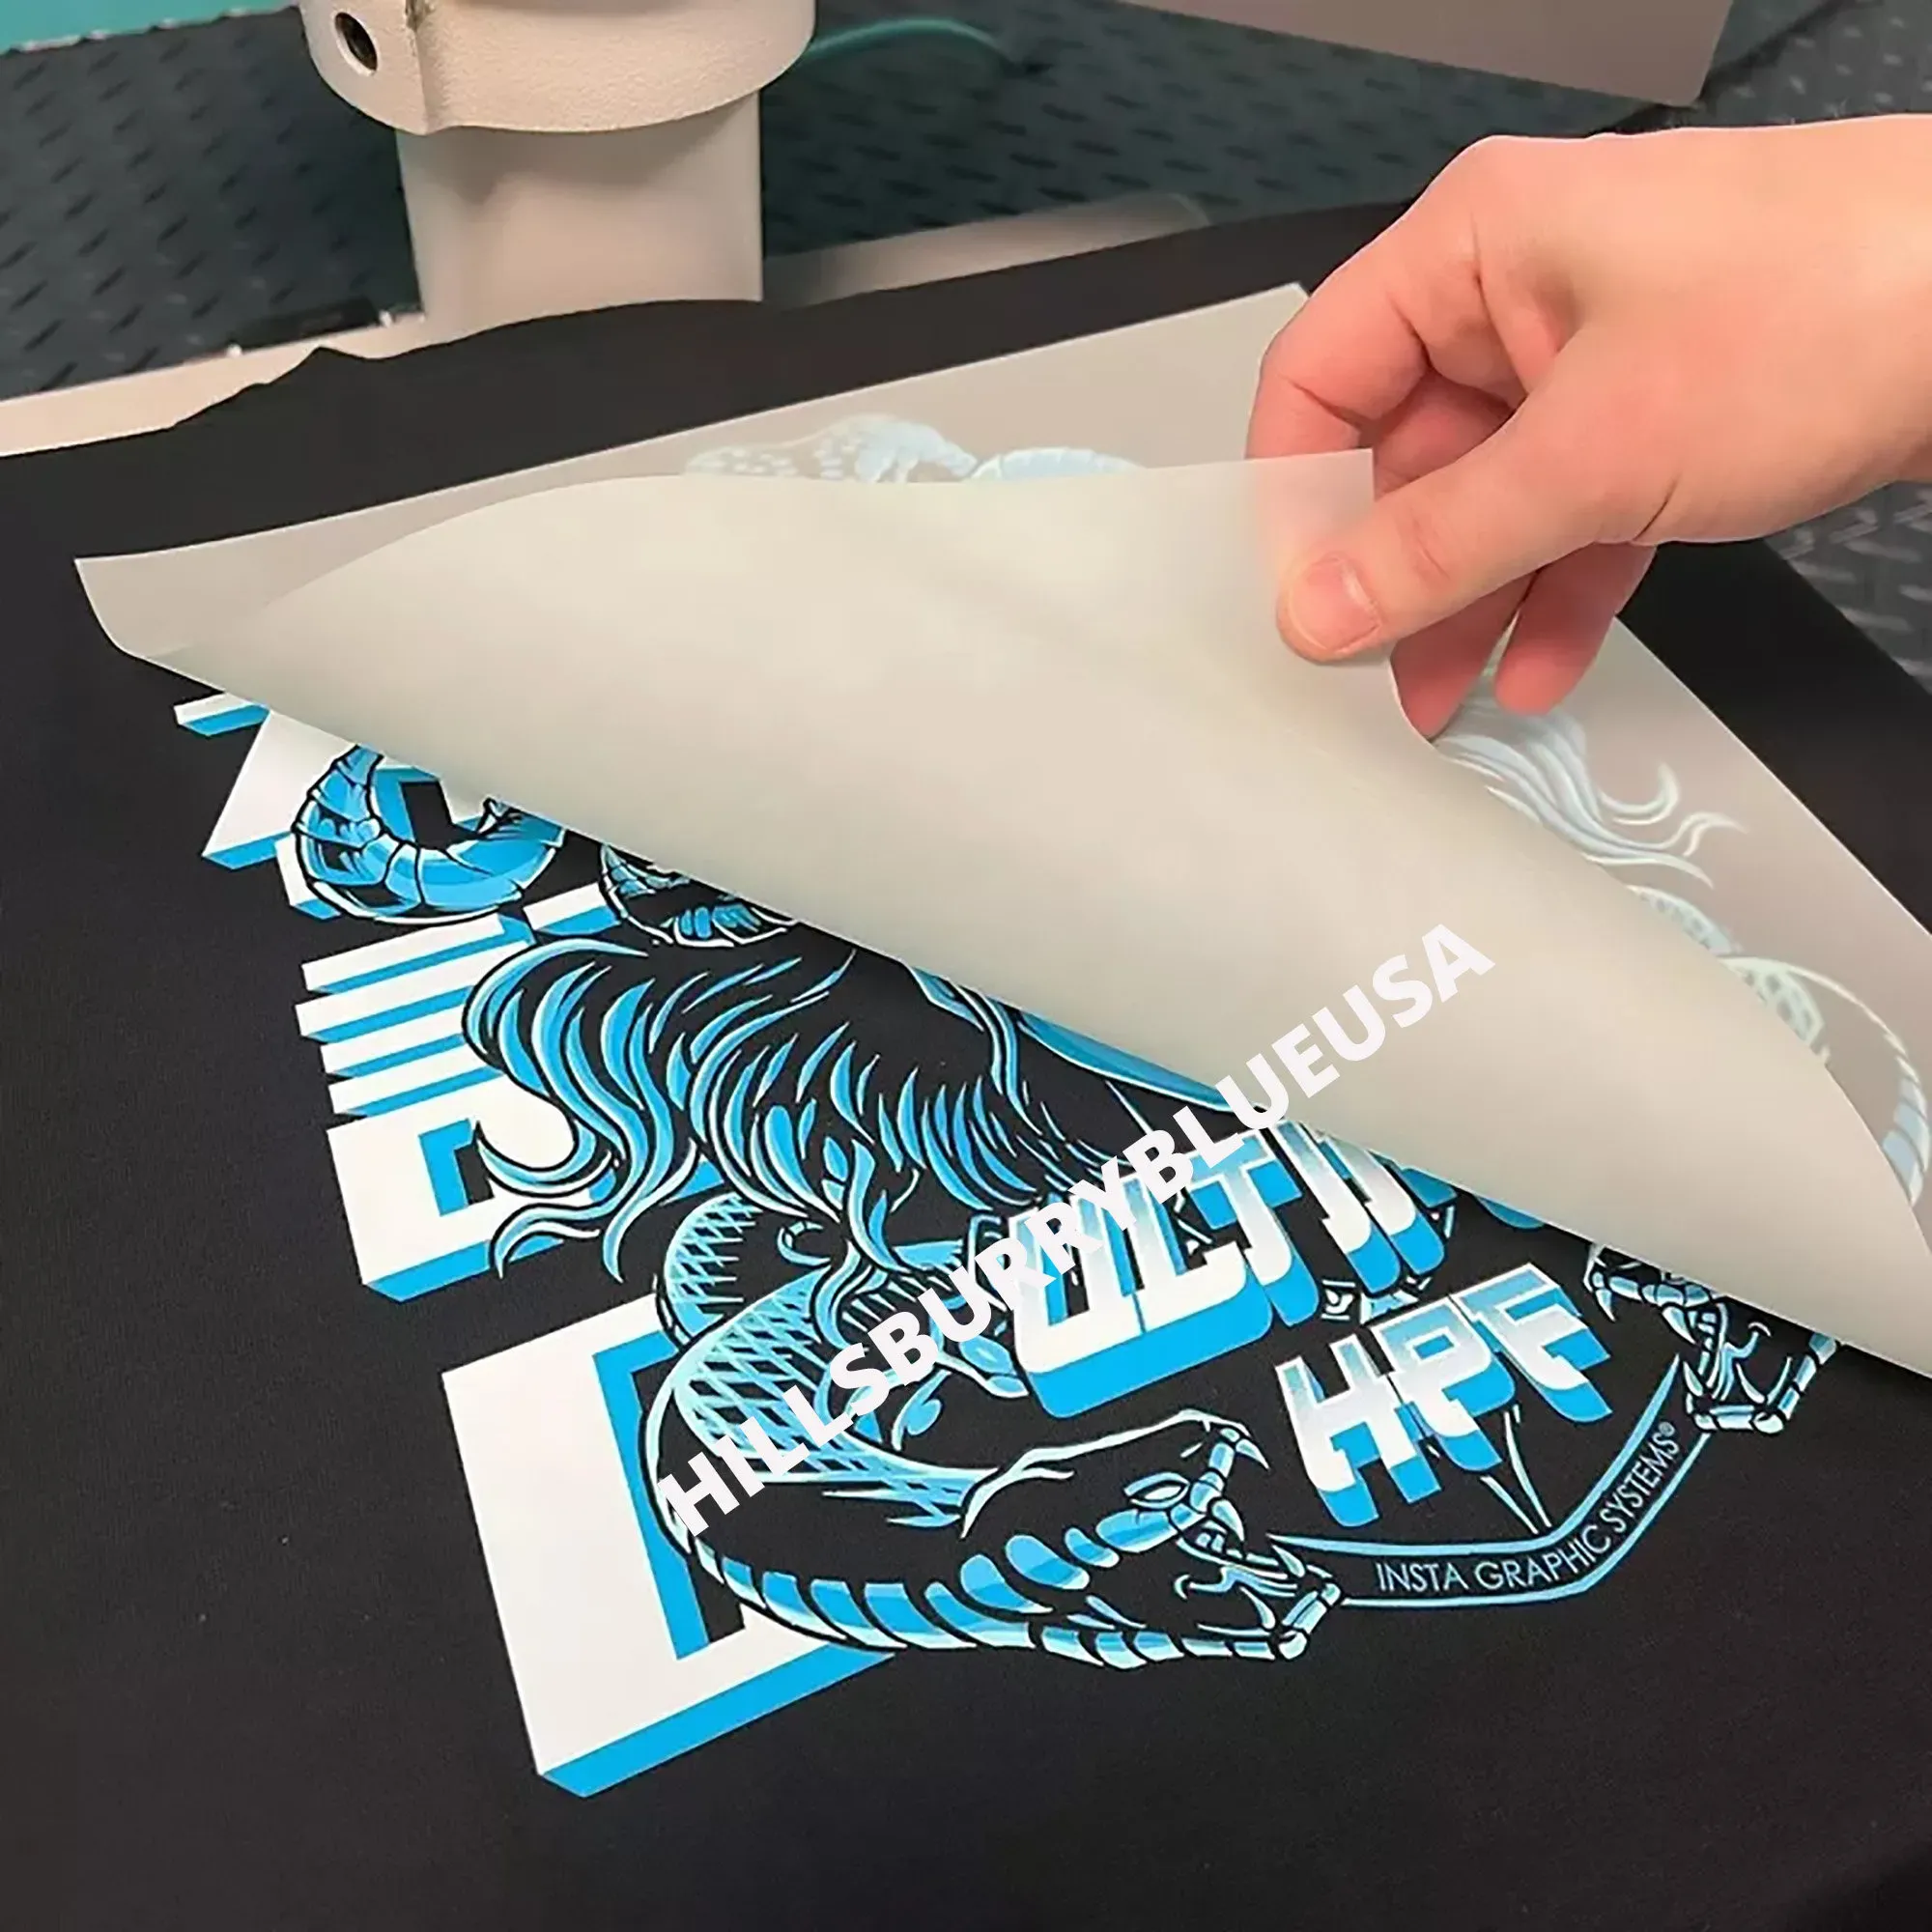
After printing, adhesive powder is evenly distributed over the film and cured to form a heat-activated layer. The transfer is then trimmed and prepared for the press, ready to apply to the chosen fabric. The final step is a controlled heat press that activates the adhesive and polymer layer, bonding the design to the garment for durable wear.
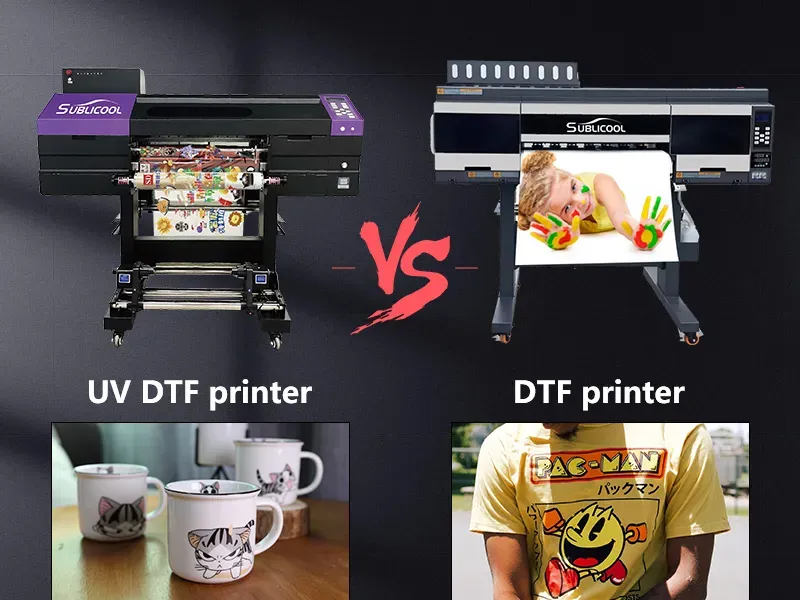
DTF vs Screen Printing: When to Use Each Method
DTF vs screen printing presents a clear set of tradeoffs for different production needs. For high-volume runs with simple color palettes, traditional screen printing can be more cost-effective due to economies of scale and faster per-unit production once the screens are prepared. However, for complex, multi-color designs or photos, the DTF printing route often offers faster setup and better color fidelity without extensive color separations.
DTF shines for small to medium runs and designs that require full color with gradients, as well as for producing on a broader range of fabrics than some other methods. When deciding between DTF transfers and alternatives, consider fabrics for DTF transfers, expected wash durability, and the flexibility of your artwork to determine the most economical and reliable option.
Fabrics for DTF Transfers: Best Materials and Care
Fabrics for DTF transfers vary in how they respond to ink, heat, and the adhesive powder. 100% cotton fabrics typically deliver strong adhesion and vibrant color, especially when used with a white underbase to maintain brightness on dark backgrounds. Cotton-poly blends often perform well too, though they may require slight adjustments to heat and pressure to preserve the fabric’s hand feel.
Testing remains essential when selecting fabrics for DTF transfers. Pre-washing helps prevent post-transfer shrinkage, and delicate or moisture-wicking fabrics may need careful parameter tuning to avoid scorching or dye migration. Practicing with swatches allows you to verify color fidelity and edge definition across different textiles before committing to larger runs.
Heat Press Settings for DTF: Temperature, Time, and Pressure
Heat press settings for DTF are critical for durability and colorfastness. Typical starting points include a temperature around 305–320°F (150–160°C) and a dwell time of 10–20 seconds, with pressure calibrated from medium to firm. Always verify the film manufacturer’s recommendations and run test presses on fabric swatches to dial in exact results for your materials.
Pre-press the fabric to remove moisture and wrinkles before applying the transfer, and use parchment or a silicone sheet to protect the film during pressing. After pressing, perform a hot peel or a cold peel depending on the film system and design, and follow up with proper garment care guidelines to maximize wash durability and color retention.
Getting Started with DTF Transfers: Equipment, Costs, and Practical Tips
Getting started with DTF transfers requires assembling the right equipment and planning a practical workflow. A basic setup typically includes a DTF printer with CMYK plus white ink capability, specialty DTF PET film, an adhesive powder, a curing device, and a reliable heat press. For newcomers, outsourcing to a reputable DTF service can help prototype designs before investing in equipment.
To build a scalable process, create a small library of designs, test across multiple fabrics, and establish color profiles and templates for consistent output. As you grow, monitor material costs and per-unit efficiency, and consider expanding film and ink inventories to support more complex artwork while maintaining quality and turnaround times.
Frequently Asked Questions
What are DTF transfers and how does the DTF printing process work?
DTF transfers are designs printed onto a PET film using a CMYK plus white ink system, then powder-coated, cured, and heat-pressed onto fabric. The DTF printing process creates a durable, vibrant image that bonds to the garment via the film’s adhesive and a heat-activated polymer layer. It supports full-color artwork with smooth gradients and fine detail straight from a digital file to the finished garment.
DTF vs screen printing: When should you choose DTF transfers over screen printing?
DTF transfers excel for small to medium runs, designs with many colors or photos, and quick setup. Screen printing is typically more cost-effective for high-volume, simple-color jobs but requires separate color separations and screens. Choose DTF transfers for flexibility, multi-color artwork, and shorter lead times.
Which fabrics are best for DTF transfers?
DTF transfers work on a wide range of fabrics, including 100% cotton, cotton blends, and poly blends. Dark fabrics benefit from the white underbase in the film for vivid color, while light fabrics maintain color fidelity. Always test on delicate textiles and pre-wash cotton to minimize post-transfer shrinkage.
What heat press settings for DTF transfers yield best results?
Common starting parameters are 305–320°F (150–160°C) for 10–20 seconds with medium to firm pressure. Pre-press to remove moisture, then press with parchment or a silicone sheet. Use a hot peel or cold peel depending on the film and design; verify settings with your film supplier.
How durable are DTF transfers and how should I care for them?
DTF transfers are durable with proper care: turn garments inside out before washing, use cold to warm water, gentle cycles, and avoid chlorine bleach. Air-dry or low-heat tumble dry, and store away from direct sunlight to preserve colorfastness. Following the manufacturer’s care guidelines will maximize longevity.
What are common issues with DTF transfers and how can I troubleshoot?
Common problems include ghosting, peeling, cracking, or color mismatch. Ensure adequate heat and pressure, confirm the powder cured fully, and use fresh film and powder. If issues persist, re-press with correct settings and re-check color calibration with a chart.
| Key Point | Summary |
|---|---|
| Definition | DTF transfers are digital garment decorations created by printing designs onto a PET film using CMYK plus white inks, applying an adhesive powder, curing, and heat-pressing the film onto fabric to produce a vibrant, durable transfer. |
| How it works (overview) | Key steps: design, print on PET film with CMYK + white, apply adhesive powder and cure, cut/weed, transfer to fabric with heat and pressure, and finish with hot or cold peel. |
| Materials & Equipment | DTF printer with CMYK + white inks; PET film; adhesive powder; curing device; heat press; transfer tape; design software (e.g., Illustrator or Photoshop). |
| Fabric Compatibility | Broad compatibility: 100% cotton, cotton blends, poly blends, and many textiles; test delicate fabrics; white underbase aids color on dark fabrics. |
| DTF vs Other Printing | DTF is often more cost-effective for small-to-medium runs with multi-color or photo designs; better fabric versatility than DTG; can reproduce full-color gradients more easily than HTV; setup is typically simpler than screen printing for smaller runs. |
| When to Use | Ideal for small–to–medium runs, full-color designs, dark fabrics, quick turnaround, and frequent design changes. |
| Application Tips | Follow film maker guidelines for temp/time; pre-press; choose hot or cold peel as required; use parchment or silicone sheets; test on swatches. |
| Durability & Care | Proper curing and washing yield durability: turn garments inside out, use cold to warm water, avoid chlorine bleach and high heat; air-dry when possible. |
| Troubleshooting | Ghosting, peeling, cracking, or color mismatch: check heat/pressure, confirm full cure, re-press with correct settings, and recalibrate printer color. |
| Costs & Getting Started | Costs vary by film, ink, and equipment; consider a service or starter kit; plan ongoing material costs. |
| Beginner Roadmap | Learn fundamentals, buy a starter kit, practice with swatches, build design templates, and scale gradually. |
Summary
DTF transfers offer a versatile, durable, full-color solution for apparel decoration. This descriptive overview explains how the process works, where it shines, and practical tips to optimize color fidelity and washfastness. For anyone exploring DTF transfers, mastering the steps—from design and printing to curing, powdering, and heat pressing—will help you produce vibrant results on a wide range of fabrics with consistent quality.