
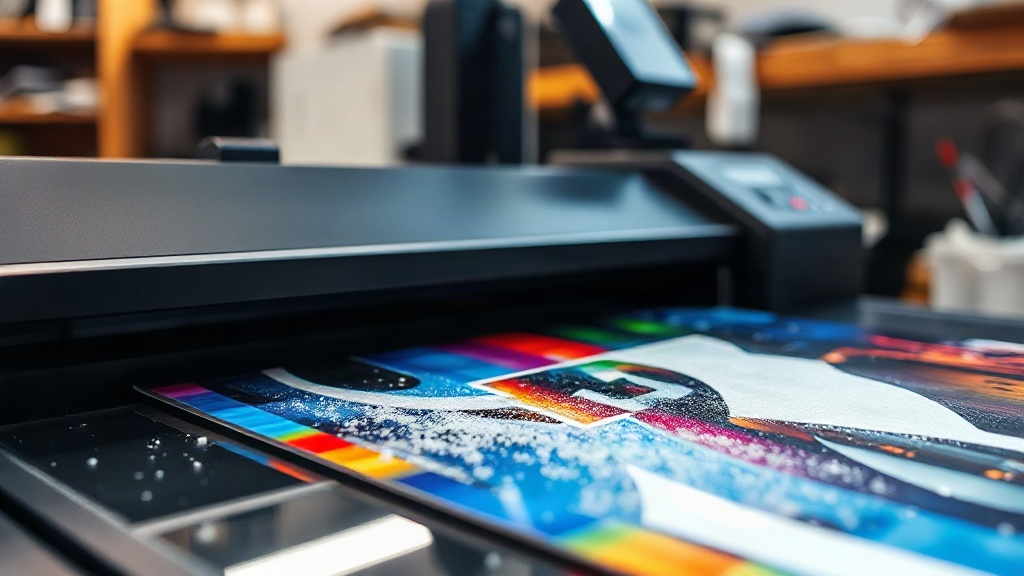
Most people who try DTF printing for the first time ruin their first few transfers. The film curls, the powder clumps, or the print peels after a single wash. None of that means the process is hard. It means the details that actually matter were never explained. This guide covers those details in the order you will encounter them, from choosing film to pulling a finished shirt off the press.
What DTF Printing Actually Is
DTF stands for direct to film. A printer lays down a mirror-image design onto a special PET film using water-based pigment inks. While the ink is still wet, a thermoplastic powder is sprinkled across the surface. The powder sticks only where ink exists. After a curing step, you have a flexible transfer that can be heat pressed onto fabric.
The important difference from DTG or screen printing is the substrate independence. A DTF transfer does not care whether your garment is 100 percent cotton, a poly blend, or something unusual like canvas or nylon. The adhesive layer bonds to the fabric, not the ink to the fiber. That single property is why small shops have moved toward this method for mixed orders.
The Supplies That Decide Your Quality
You can buy the cheapest film and powder on the market and still get acceptable results on white shirts. The moment you print on dark garments, cheap supplies fall apart. Here is what separates good output from bad.
Film
Look for double-sided matte PET film in the 75 to 100 micron range. Single-sided film works, but you have to remember which side is coated, and one wrong load wastes ink and time. Matte coating matters because it holds the wet ink in place instead of letting it bead. Glossy film causes dot gain and muddy edges on fine detail.
Ink
Pigment inks formulated specifically for DTF have a higher pigment load than standard desktop inks. They also contain a binding agent that keeps the printed layer from cracking when stretched. If you refill cartridges with generic ink, expect weak opacity on dark fabric and faster fading.
Powder
TPU hot melt powder is the standard. Particle size usually falls between 80 and 200 microns. Finer powder gives smoother hand feel but needs more careful application. Coarser powder is forgiving but leaves a slightly grainier surface. For apparel that will be worn against skin, finer is worth the extra attention.
Step by Step: From File to Finished Transfer
- Prepare the artwork. Mirror the image horizontally. Add a white underbase layer beneath all colored areas. Without it, colors will look washed out on dark garments.
- Print. Set the printer to the film profile, not a paper profile. Print quality should be high, but avoid the slowest mode unless you need maximum detail.
- Powder the wet print. Pour powder over the film and shake off the excess. A gentle back-and-forth motion works better than tapping, which can dislodge powder from thin lines.
- Cure. This is where most failures happen. You need enough heat to melt the powder into a continuous film, not just warm it. A heat press at 320 to 340 degrees Fahrenheit for 15 to 20 seconds with light pressure is a common starting point. Watch for the powder to turn glossy. That gloss is your signal.
- Press onto fabric. Transfer at 300 to 320 degrees for 10 to 15 seconds with medium pressure. Peel either hot or cold depending on your film's instructions. Most modern films are cold peel, which gives cleaner edges.
Press Settings That Actually Work
Temperature and pressure interact more than most guides admit. If your pressure is light, you need more time. If your pressure is heavy, you can shorten the dwell but risk pushing the adhesive too deep into the fabric, which causes a stiff feel.
- Cotton: 300 to 315 degrees, 12 to 15 seconds, medium pressure
- Polyester: 280 to 300 degrees, 8 to 12 seconds, medium pressure, cool peel
- Blends: 300 degrees, 10 to 12 seconds, medium pressure
- Nylon: 280 degrees, 8 to 10 seconds, light pressure, test first
Always test on a scrap piece of the exact garment you plan to sell. Fabric finishes, dyes, and even moisture content change how adhesive cures. A shirt that pressed perfectly yesterday can behave differently today.
Common Problems and What They Mean
The transfer peels after washing
This is almost always under-curing during the powder melt stage. The powder looked melted but was not fully fused. Increase cure time by five seconds and check that the powder turns uniformly glossy before you pull the film.
Colors look dull on dark shirts
Your white underbase is too thin or missing. In DTF printing, the white layer is what makes colors pop. Double the white layer in your RIP software or print a second pass of white only.
Edges are fuzzy
Too much powder, or powder that is too coarse. Shake off excess more thoroughly and switch to a finer grade. Fuzzy edges also come from printing on the wrong side of the film, so check that first.
The print feels stiff
You are using too much powder or pressing with too much pressure. A thinner, more even powder layer and moderate pressure will keep the hand feel soft. This matters most on large solid designs.
Where DTF Fits in a Real Shop
No single decoration method wins every job. Screen printing wins on large runs of one design. DTG wins on 100 percent cotton with photographic detail. DTF wins when you have small runs, mixed fabrics, or designs with many colors that would require expensive screen setups.
A practical workflow is to keep DTF as your default for orders under two dozen pieces and for anything going onto polyester or blends. Save screen printing for the big repeat orders. That split keeps your press time efficient and your material costs predictable.
Frequently Asked Questions
How long does a DTF transfer last on a shirt?
With proper curing and washing inside out in cold water, a well-made transfer typically lasts through 50 or more wash cycles. The adhesive and the ink layer degrade at different rates, so the first sign of wear is usually slight dulling rather than peeling.
Can I print DTF transfers at home with a regular printer?
You need a printer that accepts pigment ink and has a straight paper path, because PET film is thicker than standard paper. Many converted desktop printers work. The limiting factor is usually the curing step, which requires a heat press or a dedicated powder shaker and oven.
Do I need a heat press or can I use an iron?
An iron can work for a single test, but it cannot deliver even pressure or consistent temperature across the whole design. For anything you intend to sell, a heat press is essential. Uneven pressure is the most common cause of partial adhesion.
Is DTF better than DTG for dark garments?
For dark garments, DTF usually produces more vibrant colors because the white underbase is printed as part of the transfer rather than applied directly to the fabric. DTG on dark cotton requires a pretreat step that adds time and can affect hand feel.
What is the shelf life of a printed DTF transfer?
Stored flat, away from moisture and direct sunlight, transfers generally remain usable for six to twelve months. Humidity is the main enemy because it can cause the powder layer to absorb moisture and cure unevenly when you finally press it.