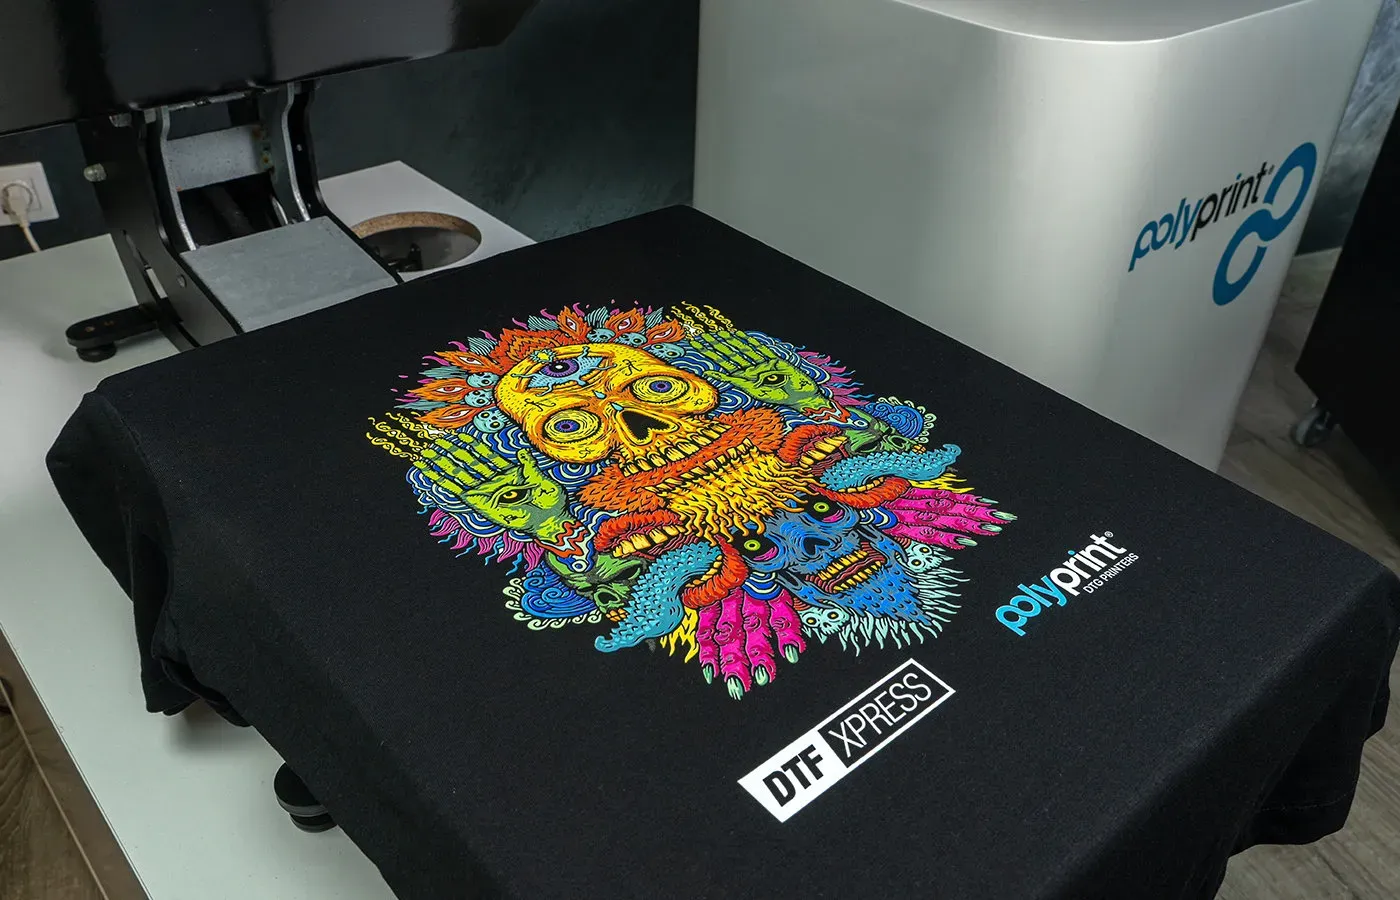
DTF transfers for T-Shirts: Design, Print, and Care Tips
DTF transfers for T-Shirts have transformed how designers bring vibrant graphics to apparel. This method uses DTF printing for t-shirts to lay down vivid colors with a soft hand feel, leveraging direct-to-film printing technology. For beginners and small runs, understanding design, print settings, and DTF care tips can save time and money. Following best practices for how to apply DTF transfers helps ensure strong adhesion and long-lasting visuals. With careful file prep and testing, you can achieve bold results across white and dark fabrics.
In other terms, this modern textile decoration method relies on a film-based transfer process that prints graphics onto a clear substrate before bonding to fabric. LSI-friendly phrases include film transfer, digital-on-fabric printing, and heat-activated adhesive applications that describe the same technique. If you search for practical guidance, you’ll encounter topics such as transfer design tips and how to apply DTF transfers, which help optimize layouts and alignment. As you compare suppliers, you’ll also hear about care considerations and durability expectations tied to direct-to-film printing workflows. Across fabrics and uses, the core idea remains the same: a film-based, heat-set graphic method that pairs flexibility with bold color.
DTF transfers for T-Shirts: Design, Print, and Care Overview
DTF transfers for T-Shirts are a modern method that uses a clear PET film and water-based inks to transfer vibrant artwork onto fabric. This approach, commonly referred to as direct-to-film printing, delivers bright colors, fine details, and a soft hand feel that holds up to repeated wear and washing more reliably than some older methods. As you explore small-batch runs or custom tees, understanding how the process works helps you plan for durability and scalability.
To maximize success with DTF transfers for T-Shirts, focus on design readiness. This is where DTF transfer design tips come into play: design at 300 dpi or higher, use vector logos when possible, and plan for a white underbase on dark fabrics to preserve color brightness. Proper file organization and a clean separation of layers also reduce misprints and speed up production.
DTF printing for T-Shirts: Selecting Films, Inks, and Fabrics
Selecting the right materials is critical in DTF printing for t-shirts. Choose a reliable DTF film designed for your printer and inks, and ensure your fabric is compatible with heat pressing. The combination of film quality and ink stability determines how well colors stay vibrant after wash cycles, especially on blends and cottons.
Consider the role of adhesives and curing temperatures in direct-to-film printing. Testing different fabrics — light, dark, and colored fabrics — helps you predict how the white underbase will perform and how to adjust press time. The goal is consistent results across batches and garment types.
DTF transfer design tips: Crafting Colorful and Durable Graphics
DTF transfer design tips emphasize building color-rich, high-detail graphics that transfer cleanly. Start with 300 dpi or higher raster images and prefer vector files for logos and typography. Establish clear layer order and plan for white ink underbase if the design sits on dark fabrics, ensuring the result remains vivid after washing.
Color management matters. Use CMYK workflows when supported and run proofs to verify color accuracy before full production. Multi-layer designs should be planned so each color prints in a separate pass with proper curing between steps, and you should avoid over-reliance on tiny halftones that can crumble during transfer.
How to apply DTF transfers: Step-by-Step for Consistent Results
How to apply DTF transfers: Step-by-Step for Consistent Results. When you have your design ready, start with a clean, dry surface and pre-press for a few seconds to remove moisture. Then position the transfer, set your heat press to the recommended range (often around 305-320°F / 150-160°C) and apply steady pressure for 12-20 seconds. This is a practical application workflow that aligns with how to apply DTF transfers.
After pressing, allow the film to set briefly and follow the product’s guidance on whether to peel warm or cold. Maintain even pressure throughout and ensure the transfer cures fully to prevent ghosting or cracking. For multi-layer designs, apply colors in order with brief partial cures between steps to improve adhesion and color density.
DTF care tips: Prolonging the Life of Your Graphic T-Shirts
DTF care tips: Prolonging the Life of Your Graphic T-Shirts. Caring for DTF-printed tees starts with washing practices: turn shirts inside-out, use cold or warm water, and choose a gentle cycle to reduce friction on the print. Following these practices helps the ink and adhesive stay intact across many washes, preserving color and texture.
Drying and ironing habits are part of DTF care tips too. Air drying minimizes heat exposure, and if you use a dryer, select a low heat setting. Avoid ironing directly on the print; if needed, place a cloth between the iron and the design to prevent scorching or gloss marks.
Troubleshooting and Optimizing DTF Transfers on T-Shirts
Troubleshooting and Optimizing DTF Transfers on T-Shirts. Common issues include cracking, ghosting, and color fading. Start by revisiting curing times and temperatures, ensuring the adhesive is fully cured before handling, and re-testing on similar fabrics to confirm results. Direct-to-film printing can be sensitive to heat and pressure, so small adjustments can make a big difference.
Preventive optimization includes keeping a production log, doing test runs, and using quality films, inks, and adhesives. Document your settings for each garment type, track wash outcomes, and adjust color density as needed. A disciplined workflow reduces errors and helps you scale your DTF printing for t-shirts with confidence.
Frequently Asked Questions
What are DTF transfers for T-Shirts and how do they work?
DTF transfers for T-Shirts are a direct-to-film process in which artwork is printed on a PET film using water-based inks, then coated with adhesive powder, cured, and heat-pressed onto fabric. This method, also known as direct-to-film printing, delivers vibrant colors and fine details with a soft hand on various fabrics. It is well suited for small runs and personalized designs, offering durability comparable to screen printing without extensive setup.
How does DTF printing for t-shirts compare to screen printing or vinyl?
DTF printing for t-shirts offers brighter colors, greater detail, and a softer hand than most vinyl or basic screen printing. It handles small runs efficiently since no screens or vinyl cuts are required. It works on white and dark fabrics with proper inks and white underbase, and can be more cost-effective for short runs.
What are the best DTF transfer design tips?
DTF transfer design tips include designing at 300 dpi or higher, using vector art for logos, planning for a white underbase on dark fabrics, and managing colors with a CMYK workflow. Keep file layers organized and avoid tiny halftones that might break during transfer to ensure clean edges and vibrant results.
How to apply DTF transfers step by step?
How to apply DTF transfers: start with clean, pre-pressed fabric. Use a heat press at around 305-320°F (150-160°C) for 12-20 seconds with medium to firm pressure. After printing, ensure the powder adhesive is fully cured. Position the transfer, apply heat, then peel while warm or cool as directed by the product. For layered designs, apply each layer sequentially.
What are DTF care tips to extend the life of a DTF transfer?
DTF care tips include washing shirts inside out in cold or warm water with a gentle cycle and mild detergent. Avoid bleach and solvents. Tumble dry on low or air dry when possible. Do not iron directly over the print; if needed, iron from the backside or place a barrier between the iron and design.
Which fabrics work best with direct-to-film printing?
Direct-to-film printing works well on cotton, cotton blends, and many polyester blends, including light and dark fabrics. Always test on the specific fabric, as weave, fiber content, and stretch can affect adhesion and appearance. Avoid very delicate fabrics that cannot tolerate heat.
| Topic | Key Points | Notes |
|---|---|---|
| What are DTF transfers? | Direct-to-film transfers are a heat-press printable graphic method. Artwork is printed on PET film with water-based inks, then coated with a powdered adhesive and cured. The transfer is applied to fabric with a heat press, bonding the design. | Compared to screen printing or vinyl, DTF transfers offer high color vibrancy, fine detail, soft hand feel, and easier customization for small orders. |
| Design considerations | – Resolution and color: 300 dpi or higher; vector logos; rasterize high-res images. – Color management: CMYK workflows; color proofs; white ink layers may be needed on dark fabrics. – White underbase: Improves vibrancy on dark shirts. – Layout and sizing: Consider seams and curves; test prints for alignment. – File organization: Clearly named layers; avoid excessive halftones. |
Clean, production-friendly files reduce errors and improve print quality. |
| Printing considerations | – Film quality and ink: Use reliable films and compatible inks. – Print direction and margins: Fit within printable area; mirror if needed. – Curing and bonding: Ensure adhesive is fully cured to avoid ghosting or flaking. – Test runs: Validate color, texture, and adhesion on similar fabrics before larger batches. |
Color accuracy and durability depend on film/ink choices; plan tests before production. |
| Applying DTF transfers | – Pre-press: Clean, dry fabric; 5-10 seconds to remove moisture. – Heat press: Typical 305–320°F (150–160°C) for 12–20 seconds with medium to firm pressure. – Pressure and time: Maintain steady, medium-high pressure. – Post-press: Let adhesive set; peel warm or cool per product instructions. – Multi-layer designs: Apply layers sequentially with brief cures between. |
Follow manufacturer guidelines for best results; results vary by product. |
| DTF care tips for longevity | – Washing: Inside-out; cold or warm water; gentle cycle. – Detergents: Mild; avoid bleach/strong solvents. – Drying: Air dry preferred; if dryer, low heat. – Ironing: Do not iron over print; use backside or cover cloth. – Stain removal: Gentle removers; avoid solvents that affect transfer. |
Proper care extends life; follow care tips to maintain vibrancy. |
| Troubleshooting | – Cracking/peeling: Check curing and heat times; re-press if needed. – Color fading: Review color management and ink compatibility; re-test. – White underbase gaps: Increase underbase density or adjust order. – Ghosting: Verify platen temp/time; ensure complete transfer removal. |
Address issues with adjustments in workflow and re-testing. |
| Beyond T-Shirts | DTF transfers suit hoodies, tote bags, hats, and other textiles compatible with heat. Always test on each material due to weave, fiber content, and stretch. | Versatile across fabrics with proper testing. |
| Practical tips | – Start simple designs to build confidence. – Use alignment marks for precise placement. – Maintain a production log (settings, temps, times, materials). – Source quality supplies; keep test swatches. – Consider sustainability with water-based inks/eco-friendly films. |
Documentation and quality materials streamline production and support sustainability. |