DTF transfers for hoodies have transformed how hobbyists and small businesses create vibrant, durable custom apparel. If you’re tired of limited color options from traditional methods, this guide reveals the potential of Direct-to-Film workflows for a wide range of hoodie fabrics. You’ll learn what you need, how to prepare your design, and specifically how to apply DTF transfers to achieve sharp images. By outlining practical steps and common settings, the guide helps you save time while maximizing color fidelity and wash durability. Whether you’re creating one-offs or scaling to small-batch orders, mastering this technique opens up new creative and business possibilities.
From a terminology standpoint, this technique is often called DTF hoodie printing, a form of direct-to-film garment transfer that sits on a prepared film and is bonded to fabric with heat and adhesive. Instead of the ink being pressed directly into the fabric, the process uses a powdered adhesive and a heat press to create a durable, vibrant image. In practice, you may encounter discussions of direct-to-film garment printing, film-transfer methods, and other LS-aligned terms that describe the same color-rich results on cotton, blends, or fleece. This approach suits DIY enthusiasts and small shops aiming to offer customized hoodies with layered artwork and smooth finishes.
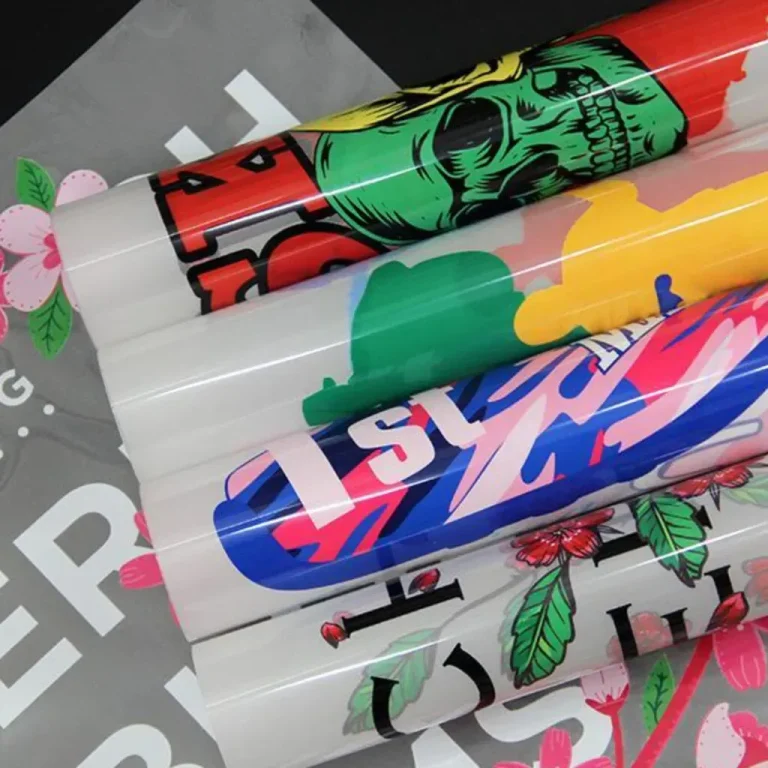
DTF hoodie printing: advantages for color-rich designs on any fabric
DTF hoodie printing delivers full-color, high-detail prints with a soft hand feel that remains comfortable after fading and washing. This method works across cotton, polyester, and blends common in hoodies, enabling complex artwork, smooth gradients, and fine typography that traditional methods struggle to reproduce on dark or heather fabrics.
Because of its versatility, DTF hoodie printing is a strong option for DIY custom hoodies and small-batch projects alike. The ability to transfer intricate designs without color restrictions expands creative possibilities, while maintaining durability and color fidelity across various garment types and weights. Whether you’re designing for personal use or a small online shop, mastering DTF adds a flexible workflow to your apparel repertoire.
Preparing artwork for DTF transfers: from concept to print file
A great DTF transfer starts with the artwork. Aim for high-resolution art (300–600 PPI) and use an sRGB color profile to maintain consistent color during printing. Plan for a white underbase when working with dark fabrics, and design with safe margins to prevent edge tears during trimming after printing.
Export and organize your files in formats compatible with your RIP software (PNG, TIFF, or PDF are common). Keep vector or high-resolution raster art to maintain crisp edges, and remember that you do not mirror the design for DTF transfers—the printer handles orientation based on the transfer workflow.
Step-by-step: applying DTF transfers on hoodies
This is the core process you’ll follow to move a design from film to fabric. Start with a pre-press to remove moisture and flatten the hoodie, then position the transfer face-down at the desired location. Set your heat press to the recommended range and apply the transfer with consistent pressure.
Common parameters include a temperature around 305–320°F (150–160°C) and a press time of 12–15 seconds. After pressing, follow the transfer’s guidelines for peeling and cooling—hot peel or cold peel can be correct depending on the film and adhesive. A brief post-press cure and a final inspection help ensure durability and edge integrity.
Best heat press settings for DTF: achieving consistent results
Getting repeatable results hinges on dialing in temperature, time, and pressure for each garment. A typical target range is 305–320°F (150–160°C) with medium to firm pressure and a 12–15 second dwell time, while pre-pressing the fabric for 5–8 seconds removes moisture and helps prevent warping.
Adjust your settings based on fabric type—100% cotton may tolerate a slightly longer or hotter press, while blends with polyester may require testing a small area first to avoid shine or scorching. Always allow a brief cooldown before removing the transfer to maximize bond strength and minimize edge lifting.
DTF transfers for hoodies vs vinyl transfers for hoodies: choosing the right method
DTF transfers for hoodies offer superior color depth, gradient capability, and durability across a broader range of fabrics compared with vinyl transfers. When weighing options, DTF vs vinyl transfers for hoodies often favors DTF for multi-color artwork and small batch runs because of its flexibility and texture that resembles direct printing.
HTV can be faster for simple logos but may wear unevenly on certain hoodie fabrics or after multiple washes. Screen printing remains economical for large runs but lacks the fidelity and color complexity of DTF on dark or heather fabrics. For many DIYers and small businesses, DTF provides a balanced mix of quality, versatility, and efficiency.
DIY custom hoodies: design ideas, production tips, and care
When crafting DIY custom hoodies, leverage bold graphics, high-contrast color schemes, and typography that remains legible on curved surfaces. DTF supports complex layering, gradients, and detailed artwork, making it ideal for themed collections—think sports, music, mascots, or streetwear motifs.
Test designs on sample garments before full production to dial in color, texture, and placement. After printing, follow care guidelines to maximize longevity: inside-out washing, cold to warm water, gentle cycles, and avoiding direct ironing on the transfer area. Regular re-pressing can refresh vibrancy if needed.
Frequently Asked Questions
What are DTF transfers for hoodies and why is DTF hoodie printing advantageous for DIY projects?
DTF transfers for hoodies involve printing a design onto a special film, applying adhesive powder, curing it, and transferring the image to fabric with a heat press. This method, also known as DTF hoodie printing, delivers full-color, high-detail images with a soft hand on many fabrics, including cotton and blends, making it ideal for vibrant DIY projects.
How to apply DTF transfers on hoodies: a concise step-by-step guide.
Pre-press the hoodie to remove moisture, then place the transfer face-down and align it. Set the heat press to about 305–320°F (150–160°C) and apply medium to firm pressure for 12–15 seconds. Peel the transfer according to the film’s guidelines (hot or cold) and allow the garment to cure with a brief post-press if recommended.
What are the best heat press settings for DTF transfers on hoodies?
Best heat press settings for DTF typically include 305–320°F (150–160°C), 12–15 seconds, and medium to firm pressure with proper pre-press (5–8 seconds). Adjust slightly based on garment type (100% cotton vs. blends) and adhesive film, then test on a small area first to ensure color and bond.
DTF vs vinyl transfers for hoodies: which method should you use?
DTF transfers for hoodies offer deeper color, smoother gradients, and better durability across fabrics, especially on dark or heather colors. Heat transfer vinyl (HTV) is faster for simple logos but may wear unevenly on some hoodies, while screen printing suits large runs. For detailed designs and small batches, DTF is often the preferred choice.
DIY custom hoodies with DTF transfers: design ideas and practical tips.
For DIY custom hoodies, use bold, high-contrast graphics and legible typography. Consider themed collections and layered designs, test placements on samples, and ensure color accuracy with a white underbase on dark fabrics to maximize vibrancy.
Common issues with DTF transfers for hoodies and how to troubleshoot.
Common issues include fading colors, edge lifting, or a stiff feel. Calibrate your printer and ensure complete cure of the adhesive powder, apply even pressure at the correct temperature, and pre-press the garment to remove moisture. If edges lift, re-press with longer dwell time and check film compatibility with the fabric.
| Topic | Key Points |
|---|---|
| What is DTF and why it’s great for hoodies | Prints on special film; powder adhesive; cures; transfers with a heat press; full-color, high-detail print with a soft hand. Works on cotton, polyester, and blends; supports complex artwork, gradients, and fine text, including dark/heather fabrics. |
| Materials and tools | DTF printer or capable printer with RIP; DTF transfer film; adhesive powder; quality hoodie (100% cotton or cotton/poly blend); heat press; protective sheet; pre-press method; trimming tools; organization rack. |
| Design, file setup, and preparation | High-res art (300–600 PPI); sRGB color profile; plan white underbase for dark fabrics; avoid thin lines; use vector or high-res raster; save as PNG/TIFF/PDF; don’t mirror; add a slight border. |
| Printing, powdering, and curing | Print on transfer film; coat with adhesive powder; cure the powder; transfer to fabric with heat press. |
| Applying DTF transfers on hoodies (step-by-step) | 1) Pre-press hoodie; 2) Position transfer; 3) Temperature ~305–320°F; 4) 12–15 seconds; 5) Peel method; 6) Post-press cure; 7) Cool-down and inspect. |
| Best heat press settings | Temp 305–320°F; Time 12–15s; Medium–firm pressure; Pre-press 5–8s; tailor to fabric type (cotton vs blends); allow cooling after press. |
| DIY design ideas | Bold, high-contrast graphics; themed collections; legible typography on curved surfaces; layered designs; test on samples; leverage gradients and detail. |
| Care and longevity | Turn inside-out; cold/warm wash; gentle cycle; low heat or air dry; avoid ironing over print; re-press if needed to refresh vibrancy. |
| Troubleshooting | Fading: calibrate printer; check curing; Peeling: ensure even pressure/temp and proper pre-press; Stiff feel: thinner hoodie or lighter adhesive; White underbase issues: ensure opacity. |
| DTF transfers for hoodies vs other methods | Better color depth, gradients, and durability across fabrics vs HTV/screen printing; cost-effective for small batches; versatile; HTV may be quicker for simple logos but less durable on curling fabrics. |
Summary
DTF transfers for hoodies empower creators to produce vibrant, durable designs with fewer compromises on color and detail. With proper materials, setup, and pressing parameters, you can achieve professional results that withstand repeated wear and washing. This approach suits beginners exploring DIY hoodies as well as small print-on-demand operations looking for versatility across fabrics and intricate artwork. By testing, adjusting to garment variations, and following best-practice care, you can grow a reliable hoodie-printing workflow using DTF transfers for hoodies.